Showing posts with label CSS and HTMLTricks. Show all posts

Saturday, October 13, 2012

0 Make Clickable Images In Blogger with Fade Effect


CLICKABLE-IMAGEMost of you requested a tutorial on how to make images clickable in blogger posts, sidebars and footers so the tutorial today will not only teach you that but will also share the beautiful trick of adding the fading effectto the images i.e. the images will fade on mouse hover. So lets get things done!


How to make an image clickable?

The complete clickable image code looks like this,
<a href="LANDING URL" target="_blank"><img src="IMAGE LINK" width="" height=""  alt=""  title="" border="0" /></a>

  • Where refers to where will the image take the user when it is clicked.
  • Where IMAGE LINK refers to the URL of your picture
  • width="" and height="" has to be given proper values in pixels
  • alt="" is alternative text tag that you right to tell search engine robots what the image is about
  • title="" is the name of the image that appears on mouse hover. It is always kept the same as the alt=""
  • border="0" ensures that no border or outline appears across the image
For example for the image below I have used the following code,
<a href="http://www.mybloggertricks.com" target="_blank"><img src="IMAGE LINK" width="240px" height="180px"  alt="Clickable Koala image" title="Clickable Koala image" border="0" /></a>

clickable Koala image
When you click the image, it will take you to our homepage. Else if you want to link to the original size of image then use this code,
<a href="IMAGE LINK" target="_blank"><img src="IMAGE LINK" width="240px" height="180px"  alt="Clickable Koala image" title="Clickable Koala image" border="0" /></a>
Clicking the image below will show you its original size.
Koala

How to make the same image un-clickable?

To make any image un-clickable simply remove the href linking tag. After removing the landing address tag we get,
<img src="IMAGE LINK" width="" height=""  alt=""  title="" border="0" />
You will see that the image is no more clickable. and the code I used this time is the same one but without the href tag,
<img src="IMAGE LINK" width="240px" height="180px"  alt="unclickable Koala image" title="unclickable Koala image" border="0" />

unclickable Koala image

How to make an image fade in and fade out?

For this you will need to add a tiny CSS3 code to your template. So kindly follow these steps,
  1. Go To Blogger> Design > Edit HTML
  2. Backup your template
  3. Search for ]]></b:skin>
  4. Add the code below just above it

/*---MBT FADE OUT CODE ----*/
.Fadeout img {
filter:alpha(opacity=100);
opacity: 0.3;
border:0;
}
.Fadeout:hover img {
filter:alpha(opacity=30);
opacity:1.0;
border:0;
}
/*---MBT FADE IN CODE ----*/
.Fadein img {
filter:alpha(opacity=30);
opacity: 1.0;
border:0;
}
.Fadein:hover img {
filter:alpha(opacity=100);
opacity:0.3;
border:0;


    5.  Save your template.

Now whenever you wish to add the fading effect to your image then simply insert an additional code to the same Clickable image code that we discussed above.
To make the image Fade out simply insert class="Fadeout" to your image code like this,
<a class="Fadeout" href="LANDING URL" target="_blank"><img src="IMAGE LINK" width="" height=""  alt=""  title="" border="0" /></a>

See an example below. (Hover your mouse cursor on it)

Koala fade out

To make the image Fade in simply insert class="Fadein" to your image code like this,
<a class="Fadein" href="LANDING URL" target="_blank"><img src="IMAGE LINK" width="" height=""  alt=""  title="" border="0" /></a>

See an example,
Koala fade in

Friday, October 12, 2012

0 Add "Reply Link" to Blogger Comments


reply-link-bloggerProviding your readers with easy navigation and fun-to-use tools should always be your first priority. Whether it may be a video blog like YouTube or it may be any forums, all these great sites have a reply link attached to each comment posted on the site. Fortunately we can even add this extremely useful Reply Link to our blogger blogs to make it even more better. On clicking the reply link or reply button, an anchor link to that comment post is pasted in blogger comment pop-up form. That link will show who has been responded or replied. You can see it working just fine on MBT Comments. I am sure you would love to add it to your blogs too. So let's do it!

Add Your Personalized "Reply Link" To Blogger

  1. Go To Blogger > Design > Edit HTML
  2. Backup your template
  3. Click the "Expand widgets Templates" Box
  4. Search For ]]></b:skin>
  5. and paste the code below just above it,

/*--------------MBT Reply Link --------------*/
.MBT-replycomments{
background:#ECEAEA;
cursor:pointer;
color:#fff;
margin:5px 0;
float:right;
border:none;
padding:4px;
-moz-border-radius:6px;
-webkit-border-radius:6px;
border-radius:6px;
font:10px sans-serif;
}
.MBT-replycomments:hover{
background:#E7E7E7;
}
Make these changes:
  • To Change the Link background on active mode edit #ECEAEA
  • To Change the Link Background color on mouse hover edit #E7E7E7
  • Our Color Generator tool will be helpful
    6.    Now Search for,
<dd class='comment-footer'>
or just this,
class='comment-footer'
and just above it paste the "Reply Link" Code below,
<div class='MBT-replycomments'><a expr:href='&quot;https://www.blogger.com/comment.g?blogID=*******************&amp;postID=&quot; + data:post.id + &quot;&amp;isPopup=true&amp;postBody=%40%3C%61%20%68%72%65%66%3D%22%23&quot; + data:comment.anchorName + &quot;%22%3E&quot; + data:comment.author + &quot;%3C%2F%61%3E#form&quot;' onclick='javascript:window.open(this.href, &quot;bloggerPopup&quot;, &quot;toolbar=0,location=0,statusbar=1,menubar=0,scrollbars=yes,width=650,height=650&quot;); return false;'>Reply..</a></div>

  • You can replace the text Reply.. with anything you like
  • Replace with your BLOG ID. If your are logged into your blogger account then look at your browser address bar. You can clearly see a 18-19 digit code. Just copy it and paste it in place of *******************
blog-id
  7.   Save your template and view your blog comments the WordPress way! :>

0 Design a Professional Looking "About Us" Page


About us page
Giving a mature and professional look to your "About Us" webpage should be amongst your first priorities. Visitors have the right to know who you are and what you do and where you belong. Your About Us page is your Identity page where you add a little bio of your self and then explain the purpose of your blog or website. It's the most important page for both your regular visitors and advertisers. So Make sure you leave a good impression on them by presenting your self well. Just an hour ago I designed my personal "About Me" Page and I hope the tutorial today will make sense once you see this new proposed design,
Live Demo

What's New In it?

The Design includes 4 most important features which are:
  1. All Blogger Widgets below Post titles and at the bottom are kept hidden
  2. Three beautiful Rows Describe your Entire Concept of Website i.e 1- Your Bio, 2- Blog Purpose and 3- Concluding paragraph.
  3. Passive Voice Speech is used to make things look professional
  4. It Loads in Seconds
If you think you really need one like that then I am sure you would love to read the tutorial below.

How To Create this About Us page?

For this tutorial I will suggest that you use Windows Live Writer. WLW will make your page design even more neat and clean. So lets get to work!
  1. Copy all data in your about us page in a notepad and keep it safe.
  2. Delete every thing in your about page and start writing a fresh bio about yourself in no more than 3-4 lines. Then add an your best picture to the left of your bio. See the example below,
image
    
3.  Now you need to add some rows/paragraphs where you can talk about your services, goals etc. I would advise that you create at most two-three rows and keep them short in length. Use passive voice and avoid using "I am this and that" rather use a tone that may sound as if someone else is describing the author.  Once you have written down the paragraphs then start enclosing each paragraph one by one between this code,
<div style="border: #686868 5px solid; padding: 10px; -moz-border-radius: 15px; -webkit-border-radius: 15px">
  <div style="text-align: justify"><img style="display: inline; float: right" align="right" src="ADD IMAGE LINK HEREwidth="128" height="128" /></div>
  <div style="text-align: justify"><font color="#666666">
ADD PARAGRAPH TEXT HERE
</font></div>
</div>
<div style="text-align: justify">&#160;</div>


Do it for each paragraph. For example if you have written three paragraphs then enclose them in the codes like this,
<div style="border: #686868 5px solid; padding: 10px; -moz-border-radius: 15px; -webkit-border-radius: 15px">
  <div style="text-align: justify"><img style="display: inline; float: right" align="right" src="ADD IMAGE LINK HEREwidth="128" height="128" /></div>
  <div style="text-align: justify"><font color="#666666">
ADD PARAGRAPH-1 TEXT HERE
</font></div>
</div>
<div style="text-align: justify">&#160;</div>

<div style="border: #686868 5px solid; padding: 10px; -moz-border-radius: 15px; -webkit-border-radius: 15px">
  <div style="text-align: justify"><img style="display: inline; float: right" align="right" src="ADD IMAGE LINK HEREwidth="128" height="128" /></div>
  <div style="text-align: justify"><font color="#666666">
ADD PARAGRAPH-2 TEXT HERE
</font></div>
</div>
<div style="text-align: justify">&#160;</div>

<div style="border: #686868 5px solid; padding: 10px; -moz-border-radius: 15px; -webkit-border-radius: 15px">
  <div style="text-align: justify"><img style="display: inline; float: right" align="right" src="ADD IMAGE LINK HEREwidth="128" height="128" /></div>
  <div style="text-align: justify"><font color="#666666">
ADD PARAGRAPH-3 TEXT HERE
</font></div>
</div>
<div style="text-align: justify">&#160;</div>

Make these changes:
  • To change the border color of the paragraph edit #686868  with your preferred color choice. Use our color generator tool.
  • Replace ADD IMAGE LINK HERE with the URL of your image. Try to you use a small image 128px by 128px in size.
  • To adjust the image size edit width="128" and height="128"
    4.    Finally save your page and publish it. Visit your About Us page to see it in action! :>

Hide Widgets

Now we need to hide all widgets that appear below post titles and at the bottom of posts. These widgets are normally the social bookmarking icons, AdSense code and related post widget which appears on all your posts. To hide them kindly follow these steps,
  1. Go To Blogger > Design > Edit HTML
  2. Backup your template
  3. Check the "Expand Widget Templates" box
  4. Search for ,
<data:post.body/>
and just above it enclose all your widget codes between the code below,
<b:if cond='data:blog.url != "ADD YOUR ABOUT US PAGE URL HERE"'>
WIDGET CODES
</b:if>

Add all your widget codes between these two bolded lines. Replace ADD YOUR ABOUT US PAGE URL HERE with your About Us page link.
    5. Do the same for all the widget codes below <data:post.body>
    6. Finally save your template and visit your blog to see the page loading in seconds with a neat and clean look.

0 25 “Vertical” Navigation Menus For Blogger – CSS-HTML Tab Menus


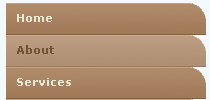
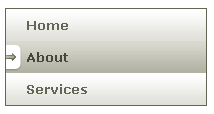
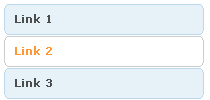
25 Navigation Menus Collection!After the release of 30+ Horizontal Navigation Menus, we head forward to a beautiful collection of some of the best looking vertical navigation menus that will put soul to anyone’s weblog or website! I have modified the codes made by Christopher and Highdots and have made them compatible with Blogger. I hope this collection will be of interest to most of you simply because these navigation menu tabs can easily be installed, customized and multiplied! I hope it will be of great help to new designers :>

How To Add A Vertical Navigation CSS Menu To Blogger?

Well the process is as simply as it can be. Simply follow these steps carefully,
  1. Go To Blogger > Layout Edit HTML
  2. Back-up your template
All Navigation Menus below uses two pieces of codes. One is The CSS code which is responsible for the look and feel of the menus and the second is the HTML code which is responsible for positioning the menus. So lets know where to add each code!
    3.   Paste the CSS code for your selected Menu just above ]]></b:skin>
    4.   For the HTML code there can be two positions either your right sidebar or left sidebar. Depends how many columns you have.
  • If you have a right sidebar then paste the HTML code just below <div id='sidebar-wrapper'>  or this <div id='sidebar-wrapper-right'>
  • If you have a left sidebar then paste the HTML code just below <div id='sidebar-wrapper-left'>
Note:- Since most templates use different coding therefore if you could not find the above codes then don’t worry simply share your blog URL in the comment box and I will view your template coding and will tell you instantly which code to search for!
    5.    Finally save your template and see a beautiful Navigation Menu hanging on your sidebar :D

Editing The Links In The Navigation Menu

To change the Tab Menu Links and Titles, simply edit this bolded part of the HTML code,
<li><a href="#1" >Link 1</a></li>
<li><a href="#2" >Link 2</a></li>
<li><a href="#3" >Link 3</a></li>
<li><a href="#4" >Link 4</a></li>
<li><a href="#5" >Link5</a></li>

Replace #1, #2, #3 etc with your Page Links/URL and replace Link1, Link2, Link3etc with your Page Titles. If you wish to add or delete a tab then simply add or delete this line from the HTML code,

<li><a href="#" >Link</a></li>

Live Demo

For Live Demo of Other Navigation Menus Simply use our HTML Editor and Copy and Paste the CSS and HTML code at right areas and then start playing with the code :>>

See Demos With MBT HTML Editor!


Navigation Menu #1

Navigation Menu 1

CSS CODE:

HTML CODE:


Navigation Menu #2

Navigation Menu 2

CSS Code:

HTML Code:


Navigation Menu #3

Navigation Menu 3

CSS Code:

HTML Code:


Navigation Menu #4

Navigation Menu 4

CSS Code:

HTML Code:


Navigation Menu #5

Navigation Menu 5
CSS Code:

HTML Code:

Navigation Menu #6

Navigation Menu 6
CSS Code:

HTML Code:


Navigation Menu #7

Navigation Menu 7
CSS Code:

HTML Code:

Navigation Menu #8

Navigation Menu 8
CSS Code:

HTML Code:

Navigation Menu #9

Navigation Menu 9
CSS Code:

HTML Code:

Navigation Menu #10

Navigation Menu 10
CSS Code:

HTML Code:

Navigation Menu #11

Navigation Menu 11
CSS Code:

HTML Code:

Navigation Menu #12

Navigation-Menu-With-No-image-used
CSS Code:

HTML Code:

Navigation Menu #13

CSS Menu Tabs 13
CSS Code:

HTML Code:

Navigation Menu #14

CSS Menu Tabs 14
CSS Code:

HTML Code:

Navigation Menu #15

CSS Menu Tabs 15
CSS Code:

HTML Code:

Navigation Menu #16

CSS Menu Tabs 16
CSS Code:

HTML Code:

Navigation Menu #17

CSS Menu Tabs 17
CSS Code:

HTML Code:

Navigation Menu #18


CSS Menu Tabs 18
CSS Code:

HTML Code:

Navigation Menu #19

CSS Menu Tabs 19
CSS Code:

HTML Code:

Navigation Menu #20

CSS Menu Tabs 20
CSS Code:

HTML Code:

Navigation Menu #21

CSS Menu Tabs 21
CSS Code:

HTML Code:

Navigation Menu #22

CSS Menu Tabs 22
CSS Code:

HTML Code:


Navigation Menu #23

CSS Menu Tabs 24
CSS Code:

HTML Code:

Navigation Menu #24

 CSS Menu Tabs 25
CSS Code:

HTML Code:

Navigation Menu #25

CSS Menu Tabs 26
CSS Code:

HTML Code:


Ap Tuch Guide Copyright © 2011 - |- Template created by AZHAR RAHIM - |- Powered by AP Tuch Guide